
Configuring custom domain for emails
Custom email domain is the name of your brand or website domain that you use to generate email addresses for your company. By default, Loop sends all emails to your customers using no-reply@notifications.loopwork.co. Now you can interact with your customers using a custom domain which better aligns with your brand.
This feature is available under Settings > Notifications for all users on Enterprise plan.
Contents of the article
Adding a custom domain
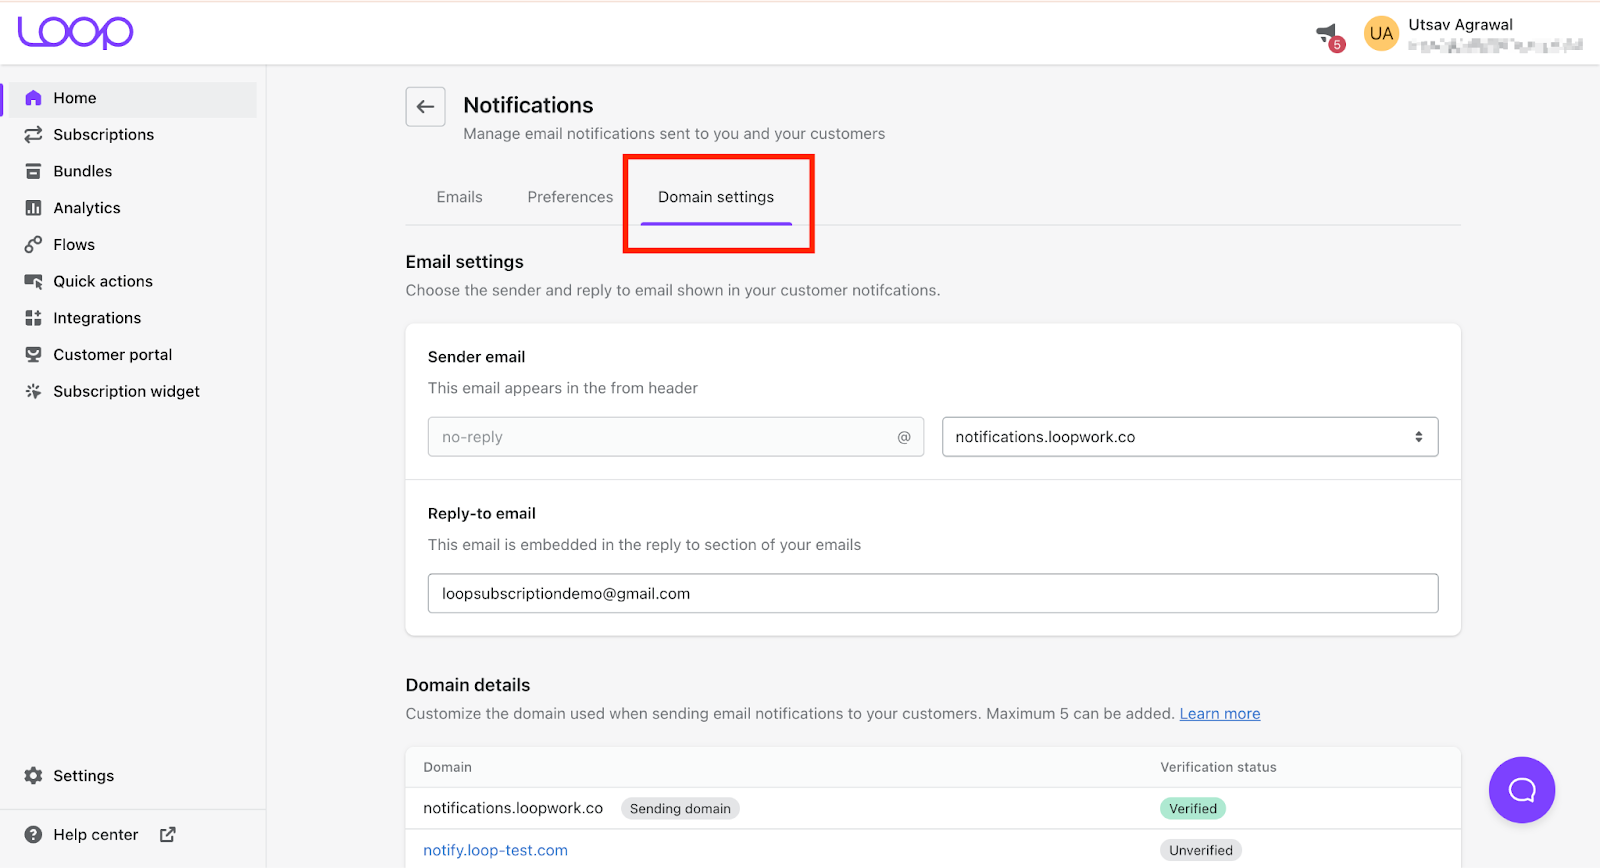
- For adding a new domain, login to Loop and navigate to Settings > Notifications > Domain settings
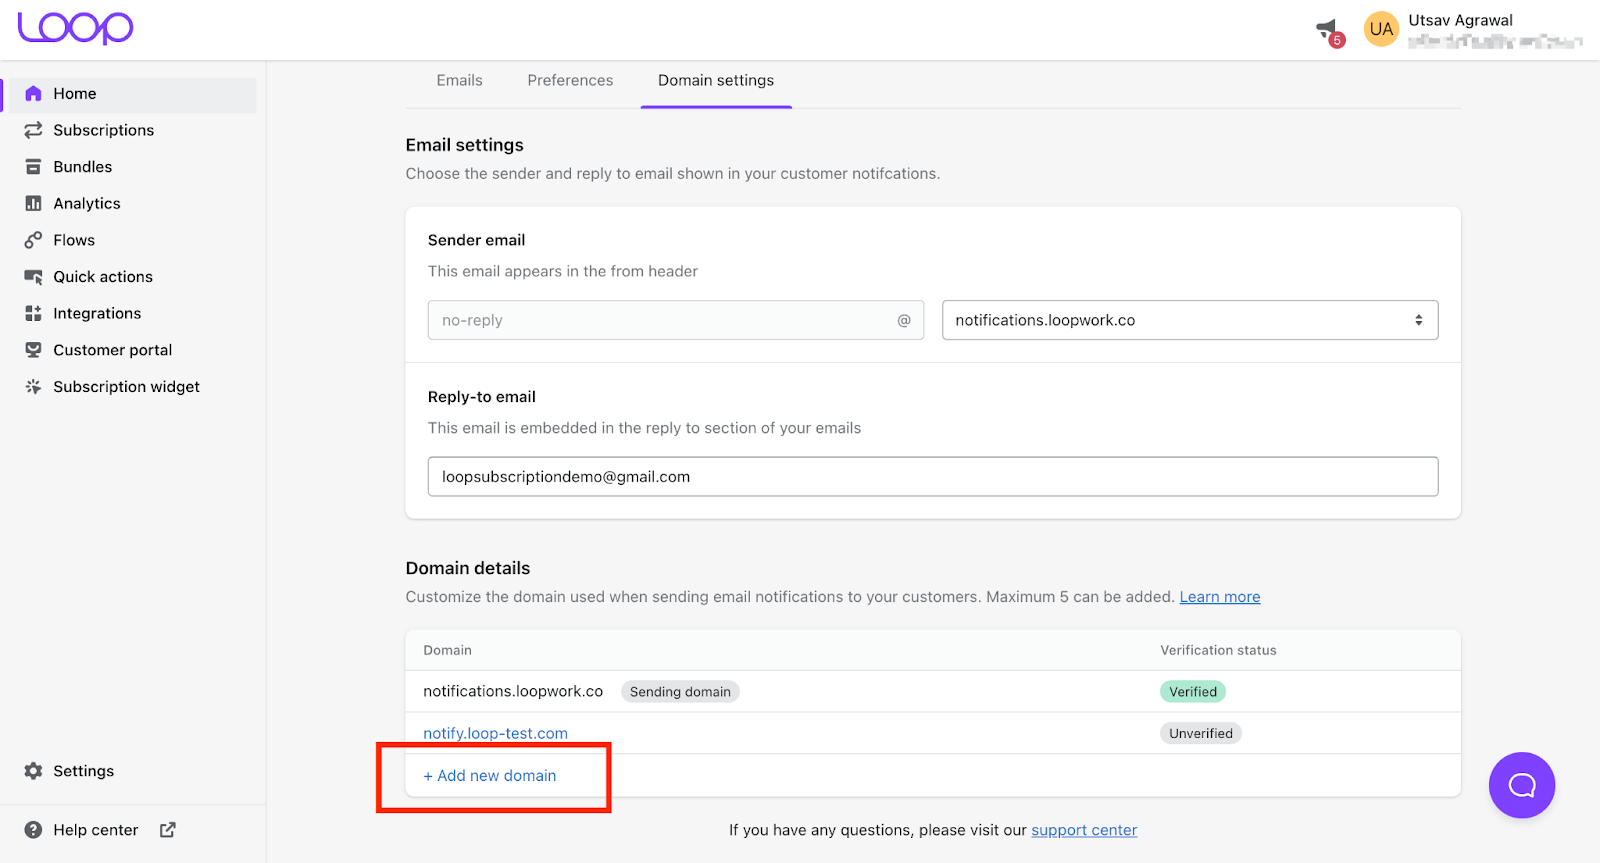
- In the Domain details section, you can see a list of all added domains along with a chip for the current sending domain.
- To add a new domain, click Add new domain button
- On the Add new domain page, enter your root domain and subdomain. A preview will be shown to depict how your domain will look in your emails.
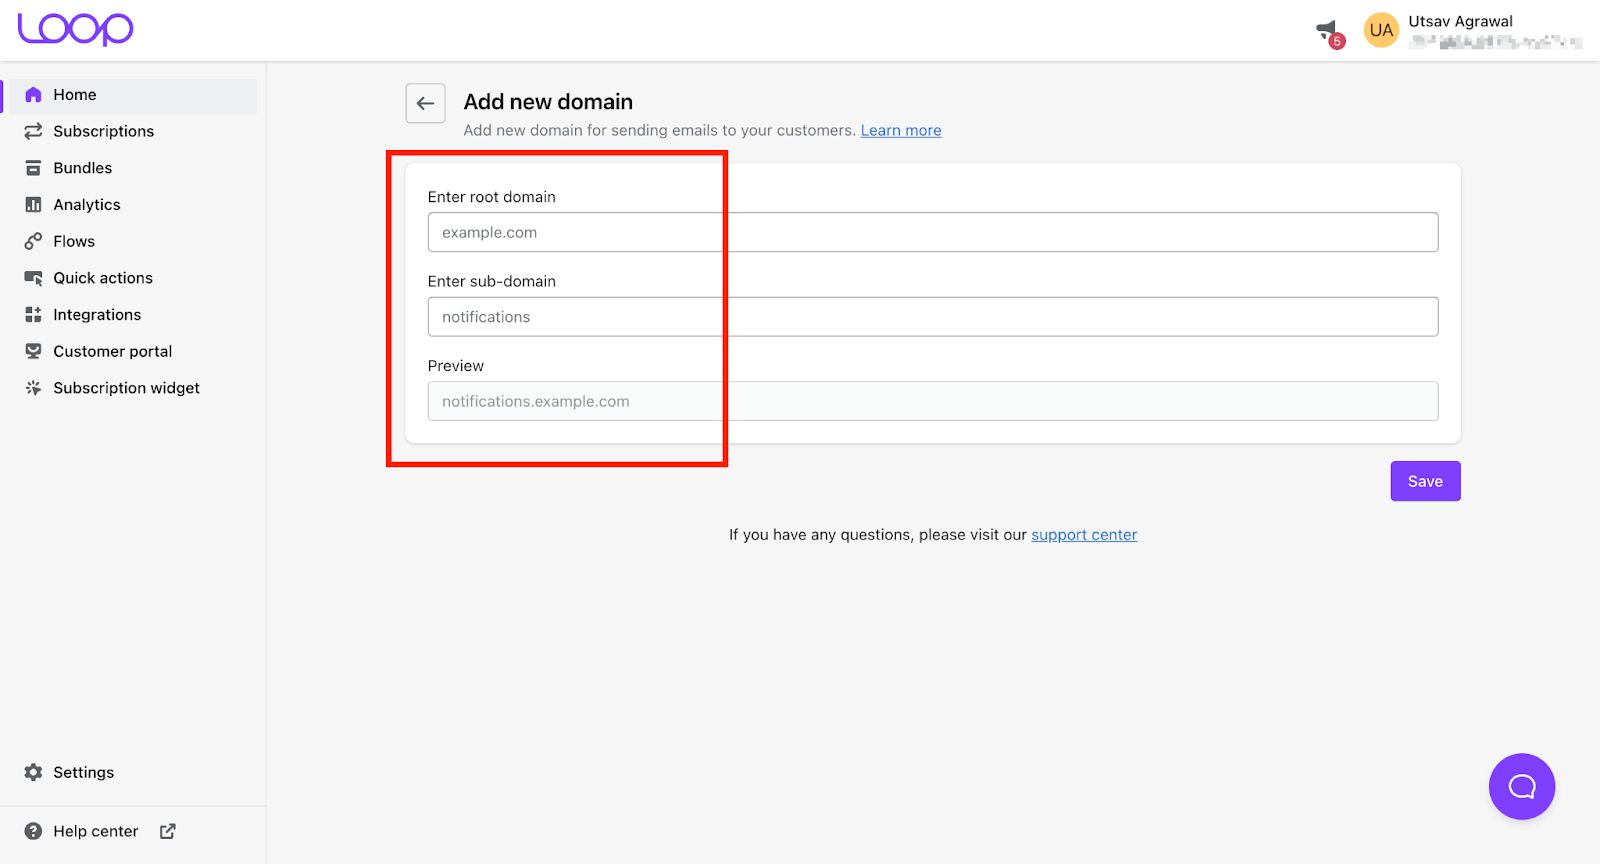
- Upon clicking save, DNS records will be generated for your domain. You will be using these records to verify your domain in the next step.
Note: Using a subdomain acts as a shield for your root domain. If your email delivery encounters issues, this can negatively impact your root domain's reputation. Recovering from this can be a tough task. Since your subdomain has a separate IP address, mailing servers, and ISPs treat it differently from your root domain.
Verifying your custom domain
- Once you have generated the DNS records for your domain, login to your domain provider’s panel to add these records in your DNS settings. Given below are articles to add DNS records for some popular providers:
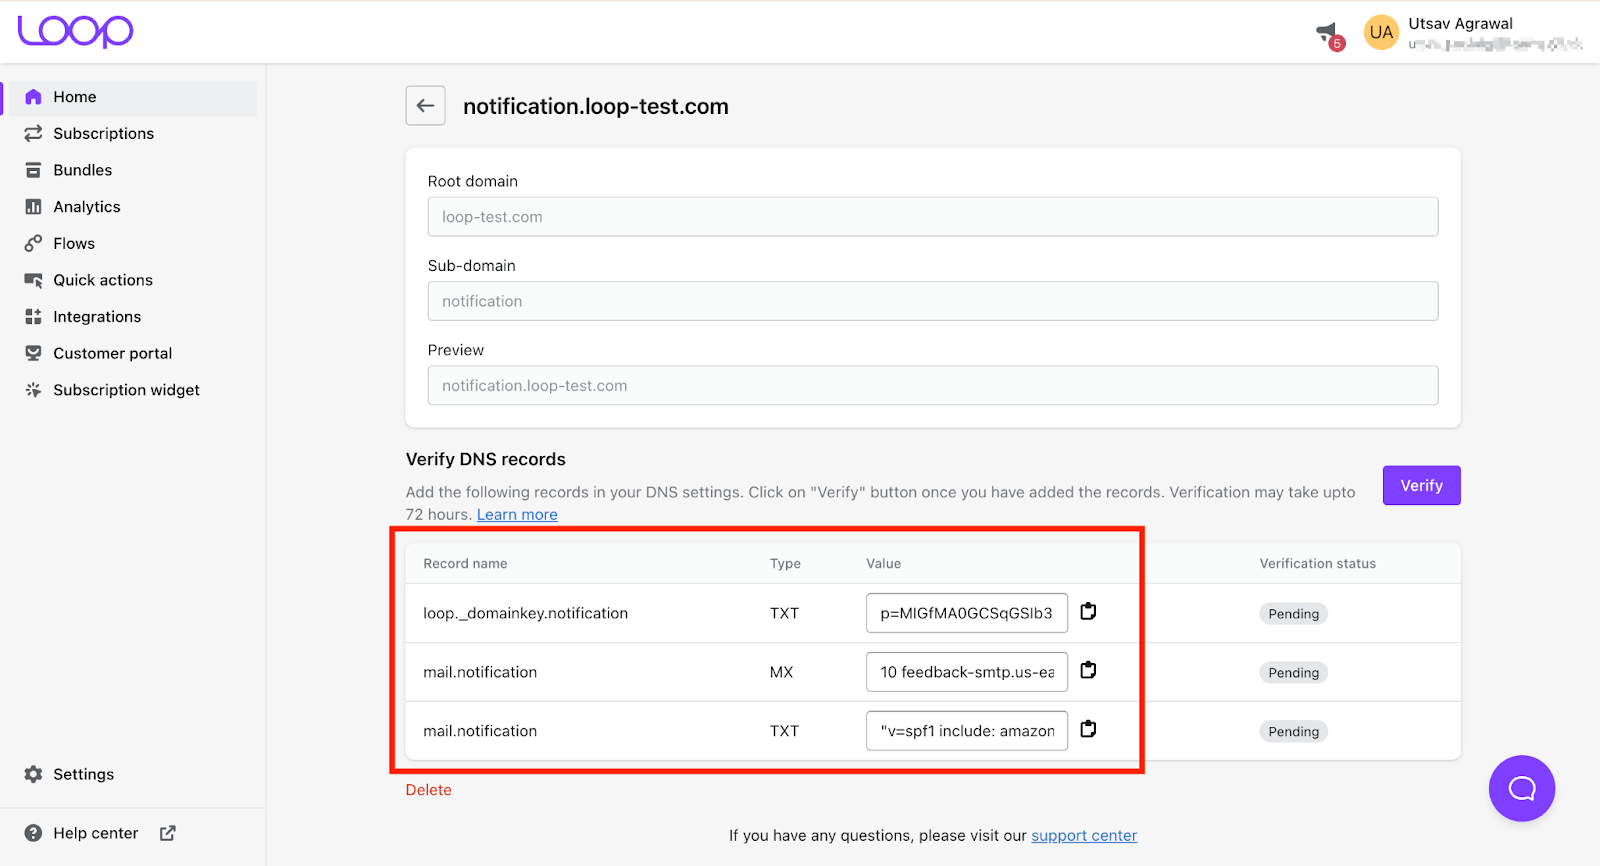
- After adding the records in your DNS settings, come back to Loop and click on the verify button. It can take upto 72 hours for the DNS records to be verified.
- Once all the records are verified, the status of the domain would be changed from Pending to Verified.

- You can send a test email to check that emails from Loop will correctly reflect the verified custom domain.
Type of records
- DKIM (DomainKeys Identified Mail) keys are used to authenticate emails to prevent spammers from impersonating a legitimate domain. Read more.
- SPF (Sender Policy Framework) is a record listing all servers which are authorised to send emails from a given domain. Read more.
- MX (mail exchange) is an entry in your DNS which specifies to the mail server how to route your domain’s email. Read more.
DMARC Authentication
You should have a DMARC policy set up to use a custom email domain. Domain-based Message Authentication, Reporting & Conformance protects your domain from phishing attacks. Major providers like Google and Yahoo have now mandated DMARC for those sending bulk emails.
Here’s a guide by Google to configure your DMARC policy.
Using DKIM, SPF and DMARC makes it much harder to impersonate a domain. Emails are marked as “spam” or not delivered by email servers if they do not pass the DKIM or SPF checks.
Changing sender email and domain
- Once you have added and verified your custom domain, you will be able to choose it as a sending domain in the Email settings section.
- You can enter your desired sender email address and choose the sender domain from the drop-down menu.
- You will also be able to change the reply to email that is embedded in the email headers.
Need help?
No need to worry, Please feel free to reach out to support@loopwork.co or ping us on chat by clicking the support beacon on the bottom right.
Thanks
Loop Subscription team